December 30, 2010

January Close to My Heart Special

Inspirations: A Sneak Peak into Spring and Summer with great savings.
When you purchase a new Wings Workshops on the Go kit for $29.95 (retail value $34.15), it opens the door for you to participate in three exciting promotions. With the purchase of the Wings Workshops on the Go kit you can choose any or all of the following:

1. Purchase new Inspiration My Acrylix® stamp sets at a super discount:

My Acrylix® Stamp Set    Discount             Price Full Retail

A Game (A1113)                $5                         $7.95

Rosy Regards (B1369)        $10.00                 $13.95

Take a Picture (C1440)       $15.00                  $18.95

Dreams Come True (D1470) $18.00                 $22.95

Bohemian Alphabet (E1019) $25.00                 $34.95

2. Get the January Stamp of the Month set, Find Your Style, at a discount or free by purchasing new Inspriation products as follows:

Purchase a Wings Workshops on the Go™ kit and... Get the Stamp of the Month for

1 item from the Inspiration brochure 25% off

2 different items from the Inspiration brochure 50% off

3 different items from the Inspiration brochure 75% off

4+ different items from the Inspiration brochure FREE!

You can also earn the January Stamp of the Month with your purchases from the Autumn/Winter 2010 Idea Book following the standard Stamp of the Month program based on dollar totals rather than item totals. Mix and match new products from the Inspirations brochure and products from the Autumn/Winter 2010 Idea Book, and we will automatically calculate the greatest savings between the standard program and this promotion for you to get the best deal possible!

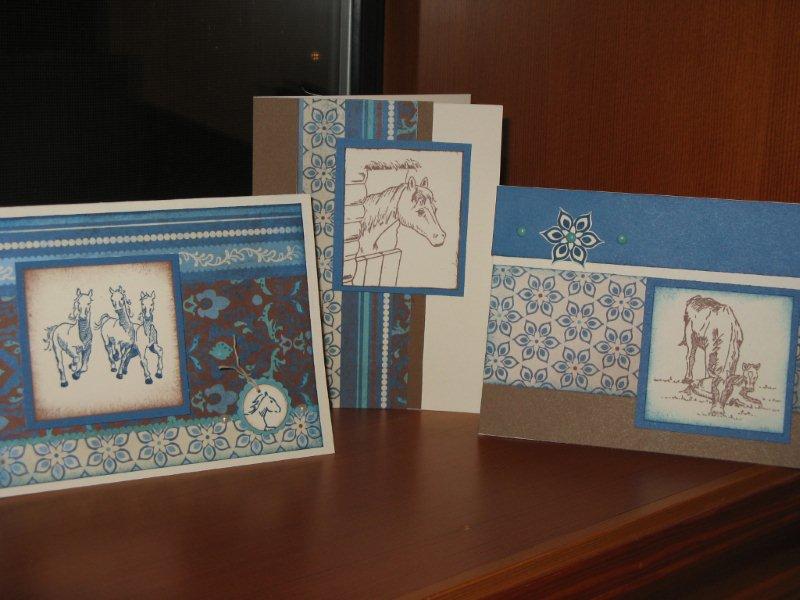
3. Celebrate National Papercrafting Month in January with a My Creations® banner project. Simply purchase a My Creations® Banner (Z1378) and you will be able to make the project with the remaining supplies from the Wings Workshops on the Go™ kit and the E-size Bohemian Alphabet stamp set. The how-to instructions are included with the Wings Workshop kit exclusively through the month of January.

And Here’s The Best Deal
Workshop on the Go $29.95         save $4.20  (includes)
          Wings Level 2 Paper Packet ($12.95)
          My Acrylix® Wings Workshop ($13.95)
          Mini-Medley Accents Black Collection ($4.95)
          Spray Pen (1) ($1.30) 
          Workshop Guide ($1.00)

Black Mini Medley Collection $4.95

Wings Ribbon assortment $4.95

A Game stamp set $5.00 (save 2.95)

My Creations Banner $.5.95

Find Your Style stamp set (January stamp of the month) FREE

Total spent: $50.80
Total Savings: $30.10
(All totals before shipping and tax)

To see these beautiful new products, visit my website and shop for your best deal beginning January 1, 2011. 


December 13, 2010

Why I love being a CTMH consultant

This last week I finished my Master's Degree in the CTMH Training Academy.  I became a consultant 8 years ago and I was trained by upline (my mom, the best) and the Stamping cousins group I was a part of.  I also went to convention after my first year.  All these opportunities were helpful and as I put together my ideas and executed them, I had my ups and downs at growing my business.  It was a bit of trial and error. 

Now when you become a consultant, not only do you have your upline and other fellow consultants on your team to support you, you have an almost endless amount of resources for training from the company.  Here are just a few of the resources that consultants have, whether just beginning or in the eighth year!  There's always something new to learn.

1.  Start with Heart:  Weekly newsletters designed to help you get your business off to a great start. They are filled with just the right information to help you prioritize and set goals. The 13 Start with Heart issues will help keep you on track for making it Straight to The Top and also obtaining your Training Academy bachelor’s degree.  (It even has guidelines for how your upline, that's me, can support you through each week.)

2.  Training Academy:  Brief, information-packed online courses in the areas of business, creative, personal development, and leadership. As you complete these courses you’ll develop a variety of skills, enhance your artistic gifts, meet and exceed your goals, and achieve leadership levels.  There are three degrees, Bachelor, Masters, and PhD.  You are rewarded at each level with a printed certificate of completion, recognition in the ribbon, and a beautiful pin when you complete your PhD. 

3.  Achievement Mentoring Program:  This 90 day program allows you to work with your upline or another leader in the company to create goals, take steps toward attaining those goals, meeting your goals and evaluating your journey.  It is mutually agreed upon relationship between two people and the mentor has online access to resources that help support in areas of improving business skills, encouraging others to stay motivated and focused on their goals, providing positive feedback and accountability, helping others face challenges, offering opportunities to learn and grow personally as well as professionally.  I took advantage of this program with my upline Naomi in the fall of 2009 and I saw a huge growth in my business satisfaction.  I have also mentored two of my downline who were able to attain their personal goals.

4.   Online Office:  This is the consultant side of the website that is complete with access to the training I have mentioned above, weekly updates from the company, a bulletin board where ongoing communication goes on between consultants about business ideas and art techniques.  The source of many great ideas and inspiration.  In addition the office allows you to place orders, monitor your customer purchases, and if you are a leader, access information to support your downline.  It has resources for marketing your personal business as well. 

5.  Convention:  I believe this is what has kept me going after all these years.  The excitement, education, support, inspiration, and appreciation you receive in person, among your peers in more valuable than I can express.  I come back every year with enough to keep me going...sometimes more than I physically can...for the next year.  This past year was the first time one of my downline was able to join me and it was so great to share the experience with her.  I am looking forward to attending with at least two of my downline next summer. 

If you have ever thought about becoming a consultant, I would love to sit down and talk with you.  I would like to hear your thoughts about how this opportunity would add blessings to your life. 

Michele

December 10, 2010

What's in a kit?

The Close to My Heart consultant kit that is.  For $129 your kit includes all the business essentials you need to get started plus your personal choices on product bundles that will support your interests in starting your business or enhancing your hobby.  You can choose three bundles and then if you want, purchase the other bundles at a huge savings of $40 each.  Here's a peek at the bundles.
If cardmaking is your delight then this choice may fill the bill.  Paper, clear cards, stamps, and embellishments to create beautiful handmade cards.  Retail value: $66.30.

Classic scrapbooking supplies including paper kit, stamps, and instructional guide to embellishing and personalizing your work.  Retail value:  $66.30.

Preserving your memories includes putting them in an album and taking them along to share with your friends and family.  This Album and accessory choice retails at $68.55.


Stamp and leave an impression on your friends who will become your customers.  Complete with blocks and stamp  organizer.  Retail value:  $83.75

Want to focus on Studio J online scrapbooking and teaching others how to preserve their memories in this medium?  Then a Studio J membership package may your choice for your kit.  Retail value:  $99.00.

Enhance your business with an all-important web presence of a MyCTMH Website.  Retail value:  $155.40.

Interested in talking more about the choices you would like to make as a beginning consultant?  I would love to help you out.  Contact me to set up a coffee date.

December 08, 2010

More ornaments ideas!

Inspired by a CTMH Training Academy course and Shari F.'s motto of use what you have, I pulled out some chipboard "slides" and "shapes" that have retired and created these photo ornaments.  The front is a chipboard covered with Mistletoe paper packet and Creative Basics.  After cutting out the shape and gluing it to the chipboard, I used the Finishing Files to smooth the rough cut edges.  The photos are cropped ad then attached to the back of the chipboard.  Then I used the photo hangers, and red ribbon to create the hanger.  A slightly larger piece of cardstock it attached to the back for a finishing touch.  This would be an appreciated gift for grandparents and family.  In addition, add one to your tree with the year stamped on it as a reminder of how your child has grown from year to year. 

If you don't have the slides and shapes, CTMH has some new ornament shaped chipboard and you can use to create a similar project. 

The kids in my Santa's Workshop were able to create and assemble these.  Great gift ideas!


December 06, 2010

Meredith's Tree Farm

At our retreat this fall, Meredith was working on her holiday cards and asked for some ideas.  Well, with a three day weekend ahead of us, I shared a tutorial I had seen by Tresa Black for a dimensional tree.  Although they may be little time consuming to make,the results are a stunningly beautiful tree.  These could also be used as an ornament.  The stamp set used is "A Timber", stamped on Olive cardstock with New England Ivy ink, and the add sparkle with Glitz Glitter glue or Bitty sparkles.  The original tutorial is here.  The only bummer is that I don't have a close up of the finished tree.  But enjoy Tresa's. 


December 04, 2010

Snow, holidays, family, and creativity: Great things that keep me from the blog!

Wow, it has been a long time since I have posted but for all good reasons. 

Snow days brought time in the "cabin" to be creative and now I can share those items with you!  Enjoy.

Christmas Stars made Mistletoe paper and snowflake brads.  Here is the original tutorial.  I also took some photos of my folding to hopefully help you out in your endeavor to create some of these stars.  It is easy to change the size, just depends on the size of square you start with.  This one is from a 4x4 square. 

The following are each made from 12 x 12 square and make fun wall decorations. 

And here are the photos and tutorial I have done to hopefully help. 

Step 1:  Fold your square in half.


Step 2:  With the folded edge toward you, fold the left edge up to be even with the top.  Crease your fold in the middle.  This is the beginning of a guide point for future folds.


Step 4:  Unfold your previous fold and repeat by bringing the top corner down so the edge is now even with the bottom fold.  Again, crease well in the middle. 
After you open up this fold, you will see a "X" to the left of your paper.


Step 5: Now bring the right corner to the "X" and crease well.


Step 6 :  Now bring that corner back over to the right creating a "cone" on the right and crease.


Step 7:  Bring the lower left corner up to meet the edges in the middle. 


Step 8:  Now fold the left side back to lay again the "cone" on the right. 

It should look like this. 


Step 9:  Now cut along the line from the left point to the middle of the fold on the right side.


Your cut will look like this. 


Step 10:  Unfold and Mountain fold the points with valley folds between the points.


Ink the edges of all the folds and points with chocolate distressing ink.


And this is what it will look like when you are finished.  Add a decorative brad to the center, a ribbon to the top and hang on your tree!  (or wall)


November 20, 2010

Another Favorite thing: Nights like tonight

Jeff and I have been intentionally planning weekends with nothing on the calendar.  It seems like we have struggled with that for a long time but it is finally becoming a reality and I am loving it.  This is what it looks like tonight.  Alli, the bookworm, pounds through page after page of anything she can get her eyes on and then wants to watch a "chick flick" with me.  Marissa the socialite needs to do something with someone so we make paper Christmas ornaments together.  She makes a plan to take orders to make and sell them so she can donate the money to World Vision Christmas project she is doing with her Sunday School class.  Then off to her second birthday party of the day.  Did I mention she is a socialite?  Jeff putters.  Those are his words.  He paid bills, winterized the sprinkler system, made fun of our "chick flick", and then putters some more.  Me, well I start getting creative.  I of course took out my list of crafts I wanted to try (most included some paper ornaments I had seen) and created with Marissa.  Then I pulled out some really old horse stamps and started making cards for Alli's horse trainer and our barn carpool partner.  All in all, I love nights like tonight where you can let your being wander into whatever feels right.  I will show you the photo of the horse notecards but will wait for the paper ornaments.  I am planning a 12 days of ornaments blog series...don't want to spoil it for you. 


November 19, 2010

One of my favorite things: Stars!


Full confession:  I spend too much time browsing blogs.  But, I do find some really cool things like an oragami pattern to make these stars!  I did these stars starting with a 12 x 12 paper so they are fairly large.  They are great smaller as well and can be used as a tree ornament.  Here's the link to the tutorial I followed.  The papers I used are from the Mistletoe paper packet and inked with a chocolate brown distressing ink.  I then put a deorative brad from the Mistletoe embellishments in the middle.  Give it a try and see what you think?  I plan to make some smaller ones and will try to make a step by step tutorial to go with it so you have more than just the drawing shown on the link.  Don't you think it would make a nice garland, strung together?  May have to try that too!

November 15, 2010

Studio J vs. Classic scrapbooking: what will I choose?

Both of course!  I love the feel of paper and embellishments, cutting, trimming, cropping and arranging my photos to create that perfect layout.  I won't give that up!  But I also love the fast, easy, no mess, scrapbook anywhere option of Studio J.  I will definitely be a dual scrapbooker.

Here is another one of my layouts from my East Coast Trip.  I was able to narrow down to a few firework shots and create this fun layout (for members only) on Studio J.


You can have a Studio J membership with fabulous benefits!

Becoming a Studio J member is the perfect way to catch up on all of your scrapbooking while also getting access to exclusive content that will give you even more creative options and flexibility. On top of that, members get our best pricing of 50% off retail—that works out to be $3.25 per page! Compare that price with other 12” x 12” printing services. You'll be hard-pressed to find a better deal!

One of the best reasons to become a Studio J member is your exclusive access to high-resolution printable JPG files as well as low-res files perfect for emailing or posting on blogs or Facebook. Members also get free Memory Protectors® for every custom-printed two-page layout ordered, as well as free shipping and handling on one monthly order.  Minimum 4 and maximum 20 layouts qualify for free shipping.

In addition, Studio J members also have access to exclusive, members-only kits and patterns, allowing for even more creativity. With all of that, members still get exclusive promotions and deals throughout their membership!
What are your membership options for Studio J?

There are three different purchase options, all with great benefits.

12 Month Membership for $99
3 Month Membership for $30
5 layout pack for $55

What is the difference between a 3-month and a 12-month membership and the 5 pack?


Both 3-month and 12-month members enjoy the same benefits; however, the pricing structure for membership differs. A 3-month membership is priced at $30 and automatically renews at $10 each month after the initial 3 months. A 12-month membership is priced at $99 and automatically renews for a 12-month term at the end of each year.  (You can cancel the renewal before the expiration.) 
 
A Studio J® 5-pack, priced at $55 US, includes 5 two-page layouts, 5 Memory Protectors®, and free shipping and handling. It’s the perfect way to try out Studio J for the first time, and it makes a great gift!

More layout samples to show in future posts. 


November 12, 2010

Studio J - The Best! Should you be a member?

We traveled to the East Coast this summer for about 10 days and between my daughter and I, we took about 2000 photos.  Now 1000 of those were of the fireworks on the Fourth of July in NYC so I only have a few more to scrapbook!  How do I scrapbook all this photos of the great places we got to explore together as a family?

Studio J to the rescue!  So much fun too!  Here is one of the layouts I just received in my October order.

Although this photo just doesn't do it justice, it is absolutely gorgeous in person!  And here are some really cool things you should know about Studio J!

•It's TOTALLY FREE to play with Studio J. Just go to my website (http://mrowley.myctmh.com/), click on Studio J, create an account and PLAY! You don't have to pay for anything unless you decide to order. So log on and play around. Check out all of the awesome features, upload some of your own photos and check out how fast and easy it is to make your own FABULOUS Studio J layouts.
•Studio J boasts great photo editing options, in addition to all kinds of great kits, layout patterns, embellishments, distressing tools and MORE!.

 •With Studio J there is no need to pay for kits, embellishments, papers, etc, etc. It's all part of Studio J. You just pay the same low membership or per layout price no matter what embellishments you add.

I will show you more layouts on my next post and share the membership options and savings.  If you can't wait, then click here to read more about it. 


November 11, 2010

The rest of the story!

I have continued to experiment with the Level One Kits and was inspired by Nona and Christine to create the additional pages and cards.  My November 1st post shows the 6x6 album I made using the level one kit and other supplies.  The following are photos of additional artwork made from the rest of the kit!  I was able to scrapbook a 12x12 double page layout and create 9 cards.  (Showing 6 of the nine here with one close up).  I added one additional product to the mix and that was the Glitz Glitter Gel to give some simple sparkle to the details at an affordable price of $2.95 per bottle. 


I used the glitter gel to make the dots around the card.  Fun and easy with lots of pizazz!

November 01, 2010

What can you get from a Level One Kit?

I just love the CTMH Level 1 Scrapbooking Kits. These are great for those who are just getting started in scrapbooking or those with limited time to scrapbook.  They are also a fun challenge who for those who like to create something out of the "intended" box.  How can you resist the beautiful paper, themed stickease, and extra cardstock for creating?  This idea is not new to the CTMH community but is often overlooked by the seasoned scrapbooker!  With my inspiration from Christine A., I created this 6x6 mini album to use for the holiday highlights this year.  Stay tuned for the scrapbook pages, cards and tags I will be creating from the rest of the kit.


Products used:

Mistletoe Level 1 Kit $9.95
6x6 My Creations Memory Showcase $3.95
Mistletoe Level 2 Assortment $4.95

October 25, 2010

My 200th Post and H2H Challenge


Wow, when I started a blog, I wasn't sure if I would really be able to continue consistently and here I am at 200!  I really have enjoyed sharing my creativity and thoughts and it has been a great outlet for me.

H2H is doing a Halloween/Fall challenge and I have done so many cards and projects this year, it is hard to decide what to share.  As I look around my studio, this is one of my favorite cards and so I will share it. 

The new opaques can be used in many different ways to dress up a card or scrapbook page.  On the clear card, they make spooky little pumpkin eyes that are so cute.  Enjoy this card and take a look at the other H2H challenge artwork.  Be inspired to create and post your artwork as well.


Here's the card closed.
When the card is open, the eyes "float" on the clear front of the card. 

October 22, 2010

Winter and Magnifique

Double duty here!  I did a gathering with Lalia and her friends on Tuesday.  Just love those gals from Sassy Scrappers!  Anyway, she wanted to see the Magnifique so we had a great time playing together.  I showed them how to do the emboss resist as shown in the first card.  The shimmer brad makes a great winter moon and I love the little sparkle on the top of the tree! 


H2H challenge was hosting an any kind of embossing challenge.  This card fits the bill! 

For this second card, I played with the glitter rub-ons.  Now I often find myself a year behind the times and this was a new product last year and I didn't really jump in with it.  Well, now that I have finally given it a try, I am asking myself "What were you waiting for?"  Silly girl.  It is cool to watch the image transform as you use the glitter sheet to add "color" to the image.  The snowflake is the glitter rub-on but doesn't sparkle too much in this photo. 

Oh and one more thing...I am getting ready for my "Holiday card buffet."  These workshop will be two and a half hours long and you can come and make as many cards as you like, for $1 per card.  Watch my newsletter for more details.